
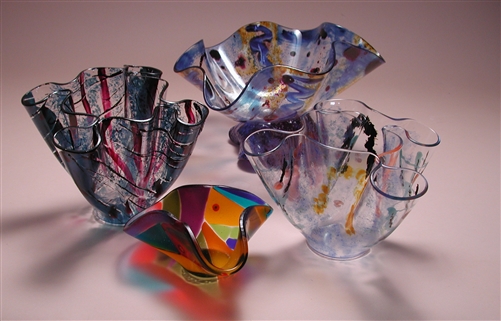
Glass slumping is an intricate and rewarding art form that transforms flat glass into stunning three-dimensional shapes and designs. This process involves heating glass in a kiln until it becomes pliable enough to mold into a desired form, often using molds made from materials like ceramic or stainless steel. The allure of glass slumping lies in its unique ability to produce custom, artistic glassware and sculptures. For those seeking to delve into this art, understanding the nuances of the technique is essential. This article explores key aspects of glass slumping, offering valuable tips and tricks for both novices and experienced artists alike.
Understanding the Basics of Glass Slumping
Before embarking on your glass slumping journey, it’s crucial to grasp the foundational concepts. The process primarily involves selecting the right type of glass, preparing molds, and managing kiln temperatures efficiently. By mastering these elements, artists can achieve remarkable results.
- Type of Glass: Not all glass is suitable for slumping. Float glass, art glass, and fusible glass are popular choices. Each has distinct thermal properties, so it’s vital to choose the right type for your project.
- Preparation of Molds: Molds can be made of various materials. Ensure they are clean and properly coated with a kiln wash to prevent glass from sticking.
- Temperature Control: Accurate temperature management is critical. Glass slumping occurs between 1200??F and 1300??F, but this can vary based on the glass and mold used. A kiln with precise control is invaluable.
For a comprehensive understanding of the slumping process, find out more about this approach.
Advanced Techniques in Glass Slumping
Once the basics are mastered, exploring advanced techniques can elevate the artistry of glass slumping. These techniques often involve experimenting with different textures, colors, and layering methods.
Texture and Color
Integrating texture and color adds depth and interest to slumped glass pieces. Artists can achieve this by:
- Using Frits and Powders: Adding glass frits and powders before slumping can create stunning surface textures and color gradients.
- Incorporating Inclusions: Materials like metal foils or wire can be included in the process to add unique patterns and effects.
For more advanced guides and tips, explore advanced guides and tips on enhancing your glass slumping projects.
Tips for Successful Glass Slumping
Achieving consistent and successful results in glass slumping requires attention to detail and adherence to best practices. Here are some expert-recommended tips:
- Test Small Batches: Before committing to large pieces, test your process with smaller batches to fine-tune kiln settings and techniques.
- Monitor Cooling Rates: Proper annealing (cooling) is crucial to prevent stress fractures. Use a slow, controlled cooling process.
- Keep a Detailed Log: Documenting each project”?s parameters, such as glass type, mold material, and kiln settings, aids in troubleshooting and replicating successful outcomes.
To discover expert strategies and enhance your artistry, discover expert strategies here.
Common Challenges and Solutions
Even experienced artists face challenges in glass slumping. Common issues include uneven slumping, surface bubbles, and thermal shock. Addressing these issues involves:
- Uneven Slumping: Ensure even heat distribution in the kiln and use molds with uniform thickness.
- Surface Bubbles: Avoid trapping air by thoroughly cleaning glass and using appropriate kiln washes.
- Thermal Shock: Prevent rapid temperature changes by following a gradual heating and cooling schedule.
For tailored solutions, learn about our tailored solutions to overcome these challenges effectively.
